|

(Click to return to the Guide
Index)
Remove / Install the
lower steering column panel
Guide Quick Jump:
'91-'94 S-Series
'95-'99 S-Series
'00-'02 S-Series
'91-'94 S-Series
Author:
PurdueGuy
Needed:
Tools:
Ratchet
7mm socket
Philips
screwdriver
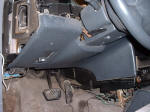
Removal
Step 1:
Remove 2 7mm screws at the top of the panel.


Step 2:
Remove 2 philips screws from bottom of the panel.


Step 3:
Remove 1 7mm screw from bottom of the panel.

Step 3:
Slide
panelforward off of OBD connector.
'95-'99 S-Series
Author:
PurdueGuy
Needed:
Tools:
Ratchet
7mm socket
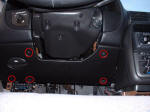
Removal
Step 1:
Remove OBDII connector. There are 2 screws holding it on
- use your 7mm socket.

Step 2:
Remove 5 screws. These all also require the 7mm socket.
Step 3: Remove hood release
handle. I haven't actually removed this personally - I
didn't need to for what I was doing. It appears to
just be a few more 7mm screws holding it on, though.
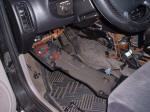
Installation is
reverse of removal
'00-'02 S-Series
Author:
(Sorry, this guide has not been created)
Click here to return to
the Guide Index.
|


