|

(Click to return to the Guide
Index)
Remove / Install
Tail Lights
Guide Quick Jump:
'91-'95 SL
'91-'96 SC
'93-'02 SW
'96-'99 SL
'97-'00 SC
'00-'02 SL
'01-'02 SC
'91-'95 SL
Author:
(Sorry, this guide has not been created)
'91-'96 SC
Author:
(Sorry, this guide has not been created)
'93-'02 SW
Author:
(Sorry, this guide has not been created)
'96-'99 SL
Author:
(Sorry, this guide has not been created)
'97-'00 SC
Author:
PurdueGuy


Needed:
Tools:
T-15 Torx screwdriver or
socket
(optional): Flathead
screwdriver or other prying device, and a rag
Removal
Step 1:
Open the trunk.
Step 2:
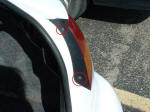
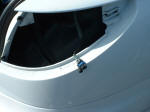
Remove the 2 torx screws. Normal thread
(counter-clockwise to loosen)

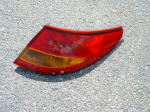
Step 3: Slide the assembly
straight back. The front end of the assembly is just
held in place with a bracket that it slides into, so pulling
straight back will detach the whole assembly, aside from the
wires still connected. You can probably get the assembly out
with your hands, but it can be difficult to get a good grip
on the light to pull it out. If you can't get it out,
use a flathead screwdriver or other prying device with a rag
over the end (to prevent scratching) and gently pop it
loose.

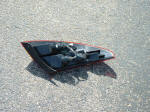
Step 4: Unhook the wiring
harness. Use your fingers or thumb to lift up on the tab
(circled) and pull the harness out.


Removing bulbs.
Twist the bulb socket counter-clockwise to release,
clockwise to lock back into place.

Installation is
reverse of removal. Make sure to line up the slide
bracket.
'00-'02 SL
Author:
(Sorry, this guide has not been created)
'01-'02 SC
Author:
(Sorry, this guide has not been created)
Click here to return to
the Guide Index.
|